YY-821N Spectrophotometer
I. Purpose
Establish a standardized and unified operation process for spectrophotometers.
II. Precautions
1. This machine is a precision instrument and cannot withstand collisions caused by drops. When in use, please place it on a relatively flat place.
2. This machine cannot be moisture-proof or resistant to moisture. Dampness or liquid splashing can easily damage this machine.
3. In order to ensure the accuracy of testing, please use this machine in a constant temperature and humidity environment.
4. This machine is a precision instrument. When using it, please avoid strong electromagnetic interference.
5. To ensure accurate measurement, please keep the instrument stable and do not shake it when testing.
6. This machine is a precision instrument. Cleaning the inside of the integrating sphere by yourself is not allowed.
7. In order to ensure the service life of the instrument, please turn off the instrument and store it after use.
III. Operating Steps

IV. Legend Explanation
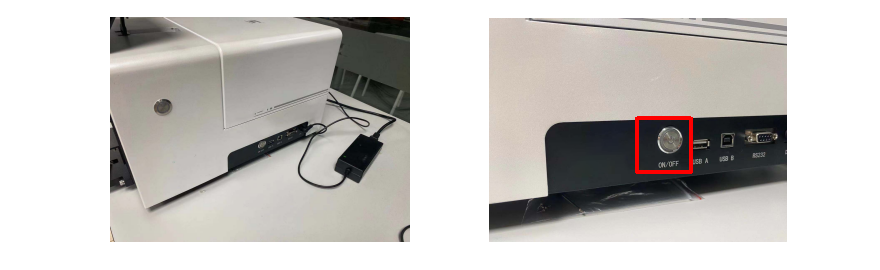
Step 1: Power on
Use the power cord to connect the instrument to the power supply. Press the power button on the side of the instrument to power on
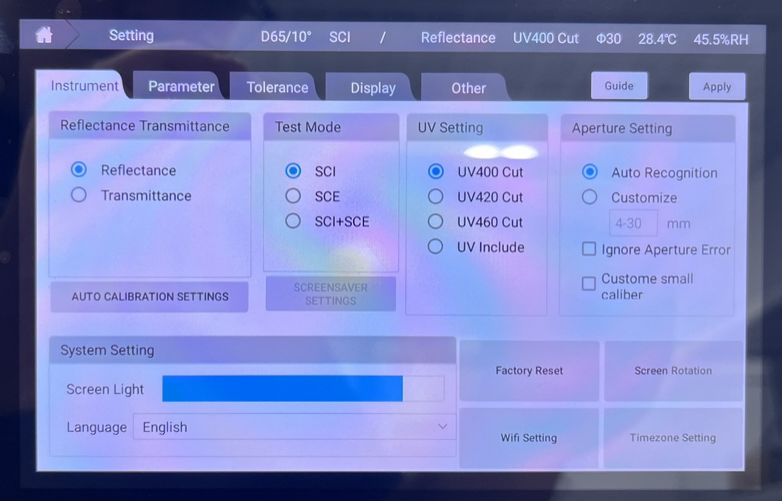
Step 2: Select measurement mode
Select "Settings" - You can choose "Reflection/Transmission"
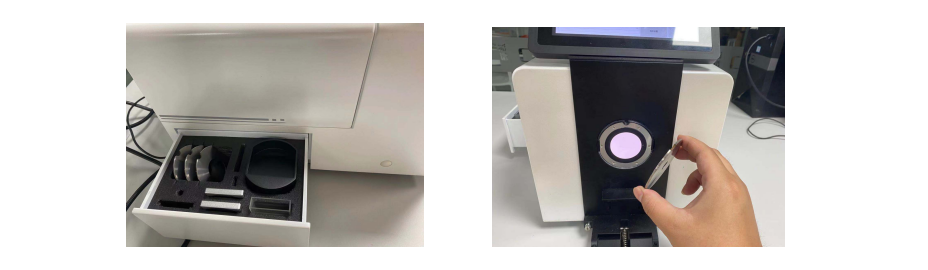
Step 3: Select measurement aperture
Take out the required test aperture from the accessory drawer box on the left side of the instrument. Pull open the handle and directly replace the required measurement aperture.
Step 4: Black and white calibration
Black and white calibration in reflection mode. Put the black calibration box into the test port and press the calibration key for black calibration. Put the white calibration plate into the test port and click the calibration key on the screen for white calibration.
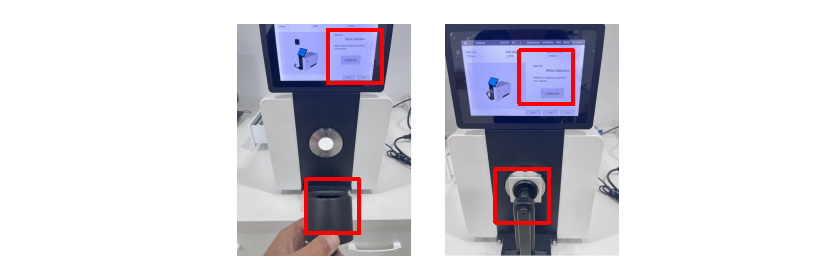
Black and white calibration in transmission mode. Put the white calibration plate into the reflection test port, open the upper cover of the instrument, and press the calibration button on the screen for calibration. (In transmission mode, the calibration measurement aperture needs to be φ18mm.)

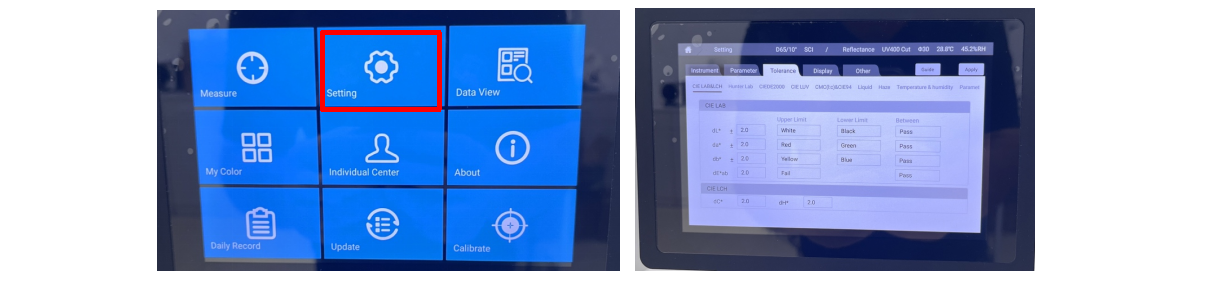
Step 5: Set tolerance
Since the requirements for data tolerance vary in different industries, before measurement, click the screen setting button to enter the setting interface where you can modify the value of tolerance.
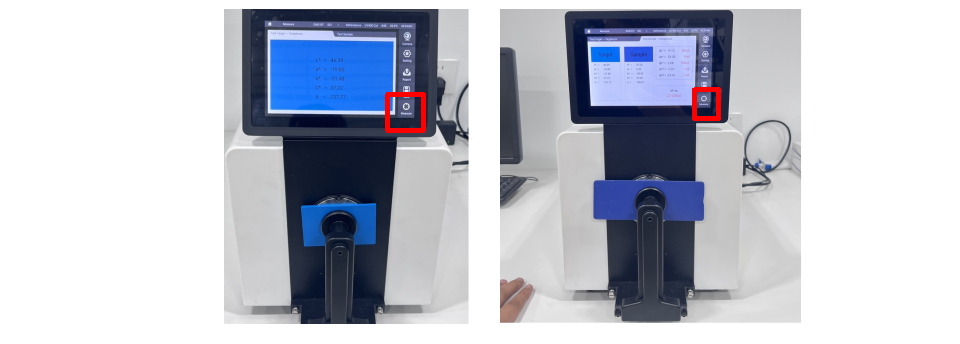
Step 6: Measure the standard sample and test sample
Enter the measurement interface. Place the standard sample in the test port and clamp it. Press the measurement button to measure the data of the standard sample. After measuring the standard sample, place the test sample in the test port. Press the measurement button on the screen to measure.
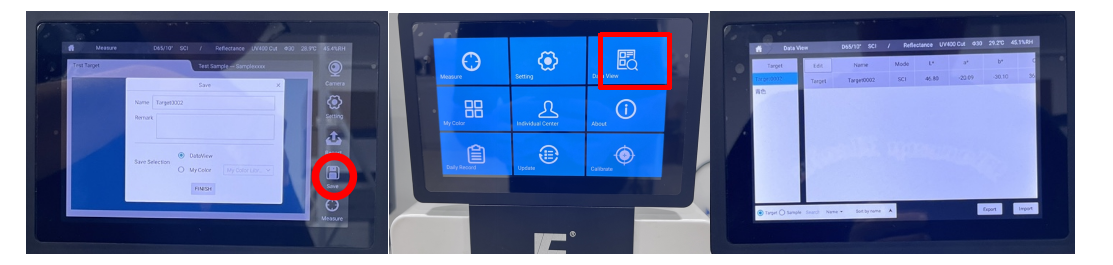
Step 7: Save data
After the test is completed, click the save button on the screen to save the test data. The saved data can be viewed in the data browsing module on the main interface.
Step 8: Complete and return to original position
After confirming and saving the data, if the instrument will not be used for a short period of time, press the power off button and put the black and white calibration items, cuvettes, and samples back in place. If the instrument will not be used for a long time, turn off the instrument and put it back into the packing box.