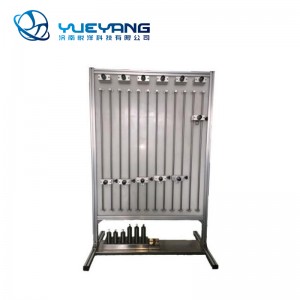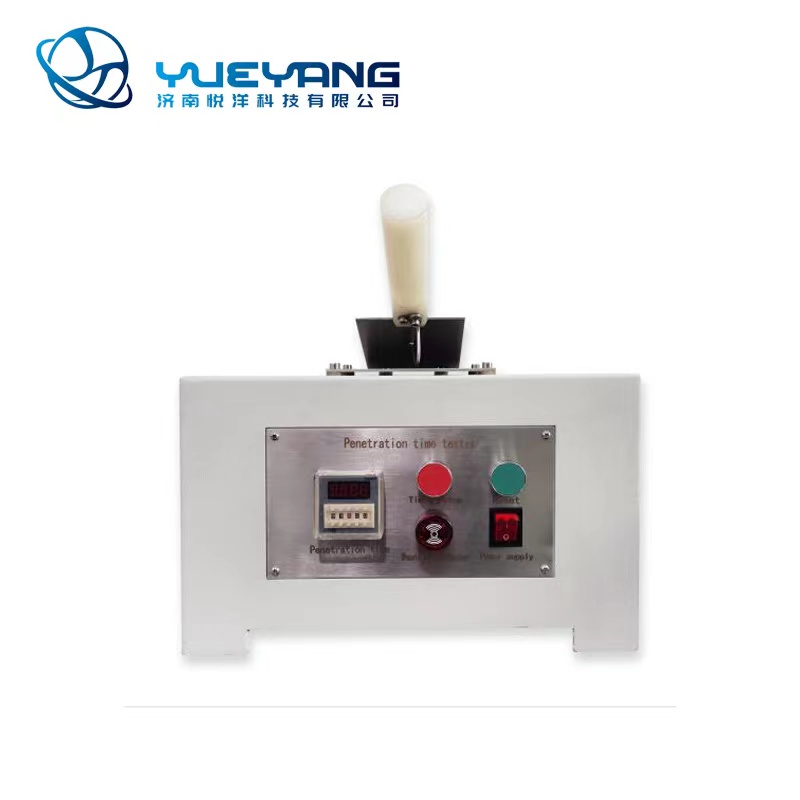
YYT-T453 Protective Clothing Anti-Acid And Alkali Test System
The conductivity method and automatic timing device are used to test the penetration time of the fabric protective clothing for acid and alkali chemicals. The sample is placed between the upper and lower electrode sheets, and the conductive wire is connected to the upper electrode sheet and is in contact with the upper surface of the sample. When the penetrating phenomenon occurs, the circuit is turned on and the timing stops.
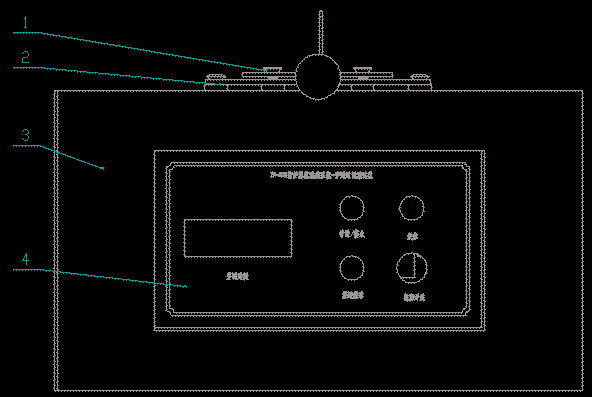
The instrument structure mainly includes the following parts:
1. Upper electrode sheet 2. Lower electrode sheet 3. Test box 4. Control panel
1. Test time range: 0~99.99min
2. Specimen specification: 100mm×100mm
3. Power supply: AC220V 50Hz
4. Test environment: temperature (17~30)℃, relative humidity: (65±5)%
5. Reagents: Promise acid protective clothing should be tested with 80% sulfuric acid, 30% hydrochloric acid, 40% nitric acid; inorganic alkali protective clothing should be tested with 30% sodium hydroxide; electrodeless acid protective clothing should be 80% % Sulfuric acid, 30% hydrochloric acid, 40% nitric acid, and 30% sodium hydroxide were tested.
GB24540-2009 Protective clothing Acid-base chemical protective clothing Appendix A
1. Sampling: For each test solution, take 6 samples from the protective clothing, the specification is 100mm×100m,
Among them, 3 are seamless samples and 3 are jointed samples. The seam of the seamed specimen should be in the center of the specimen.
2. Sample washing: see GB24540-2009 Appendix K for specific washing methods and steps
1. Connect the power supply of the instrument with the supplied power cord and turn on the power switch.
2. Spread the prepared sample flat between the upper and lower electrode plates, drop 0.1 mL of reagent from the round hole along the conductive wire to the surface of the sample, and press the "Start/Stop" button at the same time to start timing. For specimens with seams, the conductive wire is placed at the seams and reagents are dropped on the seams.
3. After penetration occurs, the instrument automatically stops timing, the penetration indicator light is on, and the alarm sounds. At this time, the time when it stops is recorded.
4. Separate the upper and lower electrodes and press the "reset" button to restore the initial state of the instrument. After one test is done, clean up the residue on the electrode and conductive wire.
5. If there is any unexpected situation during the test, you can directly press the "Start/Stop" button to stop the timing and give an alarm.
6. Repeat steps 2 to 4 until all tests are done. After the test is complete, turn off the power of the instrument.
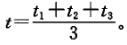
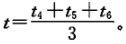
7. Calculation results:
For seamless samples: the readings are marked as t1, t2, t3; penetration time
For samples with seams: the readings are recorded as t4, t5, t6; penetration time
1. The test solution used in the test is highly corrosive. Please pay attention to safety and take protective measures during the test.
2. Use a dropper to pipette the test solution during the test.
3. After the test, clean the surface of the test bench and the instrument in time to prevent corrosion.
4. The instrument must be grounded reliably.